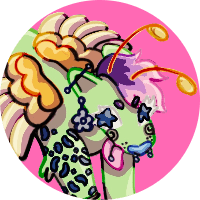
what it says in the title! once you have the basics of this mask down, you can adjust ear shapes, patterns, etc, to make fursonas, animals, anything your heart desires! this tutorial assumes you know how to make even and odd peyote charms! if you don't, check out youtube :)
Step 1
find your pattern! this tutorial will be following my kandi animal mask pattern, at this link! https://kandipad.com/pattern/kandi-animal-mask-template-13032437 i will be adjusting the ears on this pattern slightly, to fit the character i will be making!
Step 2
start the eye piece. this is started the same way as peyote charms, by finding the widest part of the charm and starting there. this is marked in the darker blue on my pattern. it's okay if it warps a bit, as pulling tight on the later rows on either end will help even this out
Step 3
build out the top two triangles of the eye piece. do this the same way you would any peyote charm! a kandi needle is helpful for threading the string through the beads. if you need to add string, make sure to attach it tightly!
Step 4
repeat this step for the bottom three parts of the eye piece. again, the same way you would a peyote charm!
Step 5
let’s now connect the top part of the mask. we will do this by threading the string through the beads on the edge of the top two triangles, like a ladder stitch. we will add more beads in between, as numbered in the picture shown above! make sure that the string passes through each bead twice, and comes out of the bead just inside the peak on each triangle.
Step 6
pull it all tight and tie it off! the eye part of your mask is now done, time to move on to the snout!
Step 7
repeat steps 2-4 twice, but using the snout part of the pattern. if your character is symmetrical you can make the exact same piece twice and just flip it! start at the nose, so that your string ends up on the side of the nose when you’re done. leave the top tail for now
Step 8
attach the outer ends of the snout to the eye piece by lining up the zig zag of the peyote stitch and weaving them together with a spare piece of thread. pull tight and tie off. your mask should now look like this! the last part of creating the face (not the ears, those are last) is creating the peak of the snout and connecting it to the inside of the eye piece!
Step 9
add beads similarly to how we attached the top triangles on the eye piece. on the last row of the snout, add 2 beads, then go through the bottom bead of the middle bottom triangle on the eye piece, then add 2 more beads. this will connect the two
Step 10
to finish attaching the snout, thread the string through the triangle drawn in the middle to close the gap, and attach 1 bead on either side. the base of your mask is now done! i’ll go over how to attach the ears next sometimes i find flipping the mask inside out helps it hold its shape easier and hide the little bits of string - give that a try if your mask isn’t wanting to stay in a nice shape!
Step 11
!! know that how you attach the ears will change depending on the size and shape of your ear, it’s mostly trial and error !! i attach my ear by weaving the string through the little bits of string that are connecting the beads of the ear and the eye piece, not the beads themselves.
Step 12
add details and a mask strap! you can add earrings, ribbon, really anything your heart desires! hot glue or super glue may be helpful for this step.
thanks for reading! i hope your mask turns out great :D