How To Make A Kandi Cuff
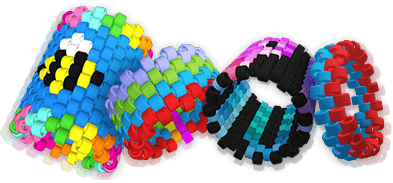
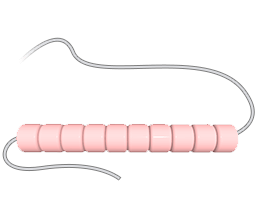
Kandi cuffs are bracelets made of plastic pony beads, elastic string, and sometimes embellishments or charms, that are worn by people of all ages. Also known as kandi bracelets, they can be made in many different designs and patterns and are a popular accessory in the rave and electronic dance music culture. People often share kandi cuffs with new friends as a symbol of friendship and unity or as a way to connect and remember experiences. Kandi cuffs can be as simple or as elaborate as you like, and can be customized to reflect your personal style.
This tutorial assumes you have a basic knowledge of reading kandi patterns.
Learn how here: How to Read Kandi Patterns
Step 1: Gather Materials
 Pony beads
 Elastic String
Step 2: Choose a Pattern
Decide on the design you want to create. There are many different patterns available in our Pattern Gallery or you can create your own right here on Kandi Pad.
Step 3: Measure Your Wrist
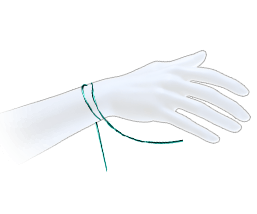
Take a piece of elastic string and wrap it around your wrist one time for each row in your kandi cuff to get a basic measurement. Then, multiply this length by 1.5-2x to ensure you have enough string and cut it at this length. (For example: if your cuff has 4 rows of beads you will wrap the string around your wrist 6-8 times. 6 rows = 9-12 times, 10 rows = 15-20 times, etc.)
*Note: If you run out of string while making your cuff you can always tie more on.
From here, there are two different sets of instructions depending on the orientation of your beads
Choose your cuff orientation:


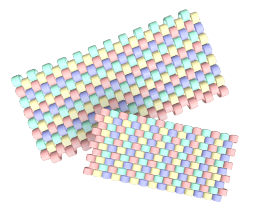
Cuff with Vertical Beads
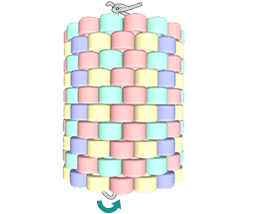
Step 4a (v): Vertical Bead Pattern
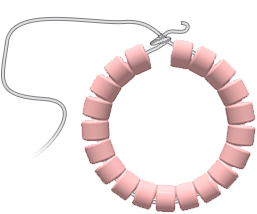
Here is the cuff we will be creating (with numbers displaying the bead row for reference).
Vertical Bead Cuffs are strung from bottom to top.
Step 4b (v): String Bead Row 1 and Tie Off
Begin by threading all of the beads from Row 1 onto your string and arrange into a circle.
Leaving one end short, tie the two ends of string together to hold beads in place.
Trim excess string from short end.
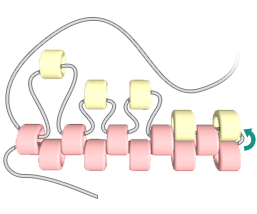
Step 5 (v): String Bead Row 2
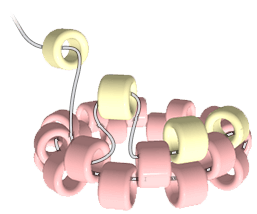
With the long end of string, thread the first bead from Row 2, then back through the first bead in row 1, and then the next bead in row 2.
Keep up this pattern until all beads in row 2 have been strung.
Step 6 (v): String Bead Row 3+
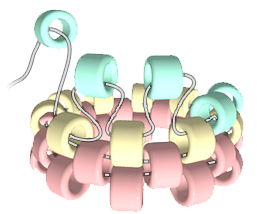
Continue with Row 3 in the same manner as the previous step, WITHOUT tying off the string. Thread the first bead from row 3, then back through the first bead in row 2, and then the next bead in row 3, etc.
Continue this pattern until the last bead of row 3 is threaded, and then move on to the rest of the rows in the same manner.
Step 7 (v): Tie Off String and Trim Ends
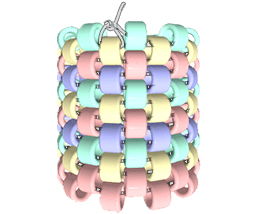
Once all rows of your cuff have been completed, tie off the remaining string so it can't come undone and trim any excess string from the end.
Browse our Pattern Gallery to find the perfect kandi cuff pattern for you!
Create Your Own kandi cuff pattern using Kandi Pad's online editor
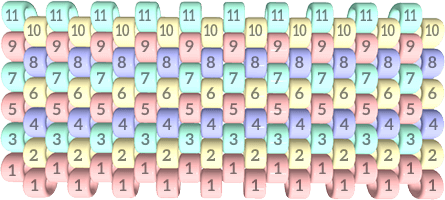
Cuff with Horizontal Beads
Step 4a (h): Horizontal Bead Pattern
Here is the cuff we will be creating (with numbers displaying the bead row for reference).
Horizontal Bead Cuffs are strung from left to right.

Step 4b (h): String Bead Row 1
Begin by threading all of the beads from Row 1 onto your string from top to bottom.
Step 5 (h): String Bead Row 2
With the long end of string, thread the last bead from Row 2, then back through a bead in row 1, and then the next bead in row 2.
Keep up this pattern until all beads in row 2 have been strung.
Step 6 (h): String Bead Row 3+
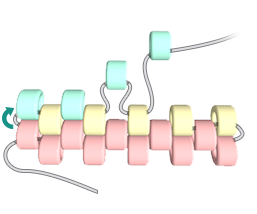
Continue with Row 3 in the same manner as the previous step, alternating directions for each row. Thread the first bead from row 3, then back through the first bead in row 2, and then the next bead in row 3, etc.
Continue this pattern until the last bead of row 3 is threaded, and then move on to the rest of the rows in the same manner.
Step 7 (h): Bring Ends Together
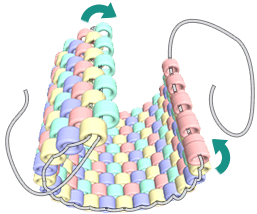
With all beads strung, bring the ends together to form your cuff.
Step 8 (h): Tie Off String and Trim Ends
Run the longer end of your string up through the last and first rows of beads, connecting them together and completing your cuff.
With both ends of string on the same side now, tie off the remaining string so it can't come undone and trim any excess string from the ends.
Browse our Pattern Gallery to find the perfect kandi cuff pattern for you!
Create Your Own kandi cuff pattern using Kandi Pad's online editor