How To Read Kandi Patterns
This quick tutorial will help teach you how to begin your kandi projects and provide you with a basic knowledge that can be applied to both vertical and horizontal kandi cuff projects, regardless of the orientation of the beads. Also referred to as a peyote stitch or multi-stitch pattern.
Typical Pattern Layout:
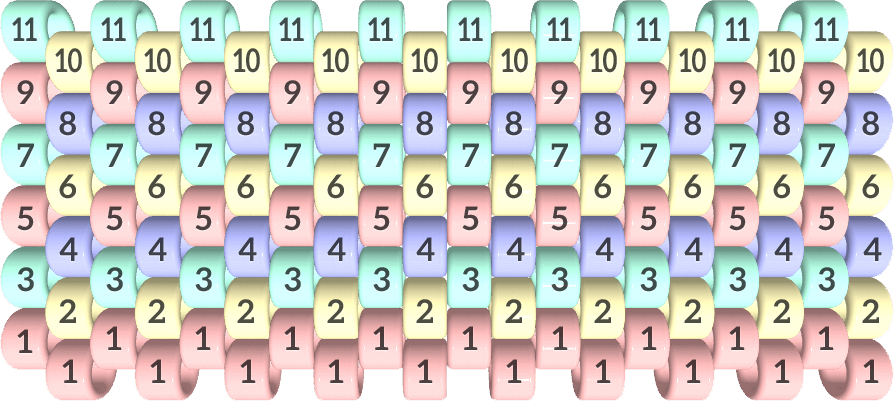
Step 1: Thread String Through Bead Row 1

Begin by threading all of the beads from Row 1 onto your string, beginning with the left-most bead and ending with the right-most bead.
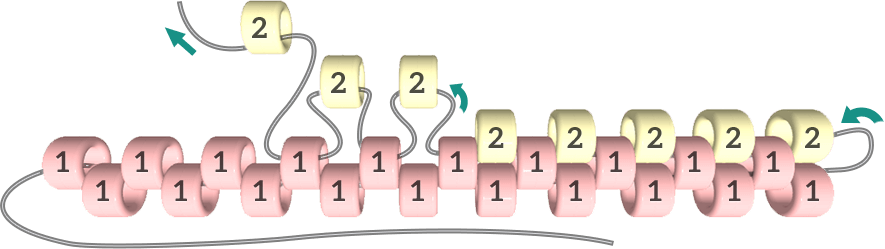
Step 2: Alternate String Through Next and Previous Rows
While the concept is the same throughout, the thread order of the beads differs depending on whether you are creating a cuff or a flat panel. The following illustrations refer to threading a flat panel. Visit our "How to Make a Kandi Cuff" tutorial for in-depth instructions on how to thread beads for cuffs or bracelets.
The main idea for Row 2 and up is to alternate threading a bead from the next row with the previous row.
So for Row 2 you will thread a bead from row 2, then back through a bead in row 1, then the next bead in row 2, etc.
For Row 3 you will thread a bead from row 3, then back through a bead in row 2, then the next bead in row 3, etc.
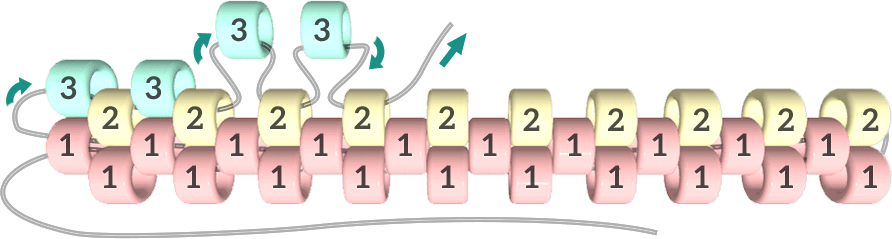
Keep repeating this pattern until you've made it all the way to top!
Browse our Pattern Gallery to find the perfect Pony Bead pattern for you!
Create Your Own Pony Bead pattern using Kandi Pad's online editor